Sunday, 18 May 2014

Major Project Production #Rider Zbursh Sculpt Shoes

I was also advised to use the same method I used to create my knee pads to start the process off. I created a higher poly shoe by taking my base mesh and turbosmoothing the mesh to get a smoother outcome. 


Image shows the smoothed mesh


I used the 3d coat programme to create a basic frame of the trainer I was using as reference.


This is the other Side of the repo mesh.


Once Repo was imported back into 3ds max I was again able to use the shell modifier to add depth to the other sections of the mesh.


I also decided to go back and add some shoe laces and also the shoe pieces around the laces.

Once in Zbrush it was a just a matter of subdividing the mesh enough to add noise. With this done I also began to add colour to the mesh. 


Once all the noise was applied to each area of the mesh. I started to add in the detail of the stitches and laces loops.


I folllowed the same method for the logo by taking an image offline and creating a alpha I created to create the side part of the mesh.


Finally I added in the laces and applied some noise to them as well.


This image shoes off the shoe from a range of different angels.

Image of the real world shoe I used for reference.

Major Project Production #Rider Zbursh Sculpt Knee Pads


I started on the knee pad and reworked my existing mesh as wanted to make a cleaner and simpler looking mesh. As I was advised to reshape the mesh and create each part of the knee pad separately.


This image shows the new reworked mesh. 


To make each part I used 3d coat again as it locks onto the reference mesh. I simply roughed out the areas needed.


After completing the repo mesh I reimported the mesh into max so that I could edit the flat plane objects and give them depth.

After using the shell modifier on all of the parts to ensure each part is roughly the width needed.


From there I imported the whole mesh into Zbrush, I then Separated the mesh into each piece for me to work on individually.  

 I started by subdividing the mesh to a high enough subdivision that noise maker could make a good outcome. I soon realised that I needed to unwrap the mesh before using noise maker, I was advice to try before hand just encase it worked. I was easier enough though going back unwrapping each part. Then once done I followed the same process to get to the same point I left off.


Once the mesh was at the right subdivisions I was able to use the noise maker as needed to create the outcome I wanted. 

I began to add colour to the mesh to see what the final out come would look like.


This is the final outcome of the knee pad.


For the 661 logo I grabbed an image offline and created an alpha from it.

I also done the same with the second part of the logo.


Image shows the real world Object I tried to replicate.


The Projection Pipeline I used For my Bakes

X-Normal is an application to generate normal/ ambient occlusion/ displacement maps. It can also project the texture of the high poly model into the low poly model mesh.

To begin I needed to load my low and high into 3ds max. With both overlaying each other I was able to select the low poly mesh and use a modifier known as projection. which allowed me to create a cage mesh. The projection cage needs to cover the high poly mesh in order to bake down, its a way of calculating the data from both meshes. Once I had all three meshes I loaded X-normals placing each mesh where needed.

After that I used the tool ray distance calculator, this makes a accurate calculation than leaving it be, I roughly left it to calculator between 25-30 secs as anymore and there's not much of a difference.


Final step was setting up the baking options setting the resolution wanted etc, the other option I change though was the edge padding down to 2 as was recommended to me to give better results. I then selected normal and AO maps this took different times depending on the objects themselves at most though would take around 2 and a half hours to render as wanted an 8k render.

Major Project Production #Rider Zbursh Sculpt Shorts


To start off I imported my base mesh from my low poly character and followed the same process of subdividing only when need. I also decided at this point to create poly-groups. This allowed me to sculpt certain areas on the mesh as the image shows, but also make them separate from the mesh. This makes it easier for me to work on. 


This image shows me masking off the sculpted area ready for making it a poly group. 


I also added in the detail at the back but again also making it a different poly group. This was down to me making it a clean work flow for when it came to using the noise maker.


This image shows the first stage of me using the noise maker to create a mesh like effect. This was also done on the back panel. While the main part was weave and cotton like noise effect.


Then started to block in colour and as my theme is black and yellow I wanted to make my character pop, so decided to make the shorts yellow. While keeping the mesh parts black. I also started to begin adding the minor details like zips.


Image Shows the back of the short mesh.

The details then lead on to adding pocket zips and stitching seams. While using the spotlight to project the branding of clothing I chose the rider to wear. Again at this point I soon realised that my unwrap of my mesh would work properly, so I again went back to my base mesh and redone the unwrap and imported the new mesh to which project the work i've done onto.


This is the back of the final mesh.
With this all completed I exported the mesh out at the highest subdivision to use to bake in x-normals.
This allows me to bake a nice normal and AO map. For the diffuse I use zbrush still by creating the Uv map size of 8k and creating the diffuse from polypaint option. The reason for using x-normals instead of zbrush for the normal map was down to personal preference both came out well as tested. But need the AO from X-normal so decided may as well do the same with the normal. However yet again I needed to edit the unwrap and topology of the lower mesh and for that reason I decided to use the high poly mesh as a reference and use 3d coat to repo the mesh. 


After repo mesh was finished and completely unwrapped the way needed I projected the mesh and created the diffuse texture. This gave me the opportunity to make a better flowing mesh anyway so for me it was time well sent. 

Major Project Production #Rider Zbursh Sculpt Jersey

I started to work back on my character after completing the Organic Environment props. For this I imported the base mesh into zbursh. I then started to sub divide enough so that I could start adding detail. As I have learned many beginners start with high divisions, I made sure I did not make that same mistake. 


This Image shows the imported mesh.


I slowly worked my way up the subdivisions adding in the major detail first and then going into the fine detail.


However I soon came across with a problem with my base mesh and needed to fix it. For this I used the Z-Remesh option creating a better flowing mesh. 

This Image Shows the new mesh looks identical to the other shame I didn't capture a wire-frame shot instead.


I then used a method of projection making it possible to transfer what I have previously done on my old mesh onto the newly improved one without loosing detail and having to rework.


Started then to refine and add smaller details like seam lines.


However soon came to realise my seam lines were to thick I removed them, then decided to work more on the folds creating the folds around the arm pit area where the fan out.


I then got a little heavy handed and went a little bit crazy with creating folds as, this top is not a loose fitting as what the folds illustrate. As needed the top to look more tight fitting but not skin tight. This was the challenge for me.


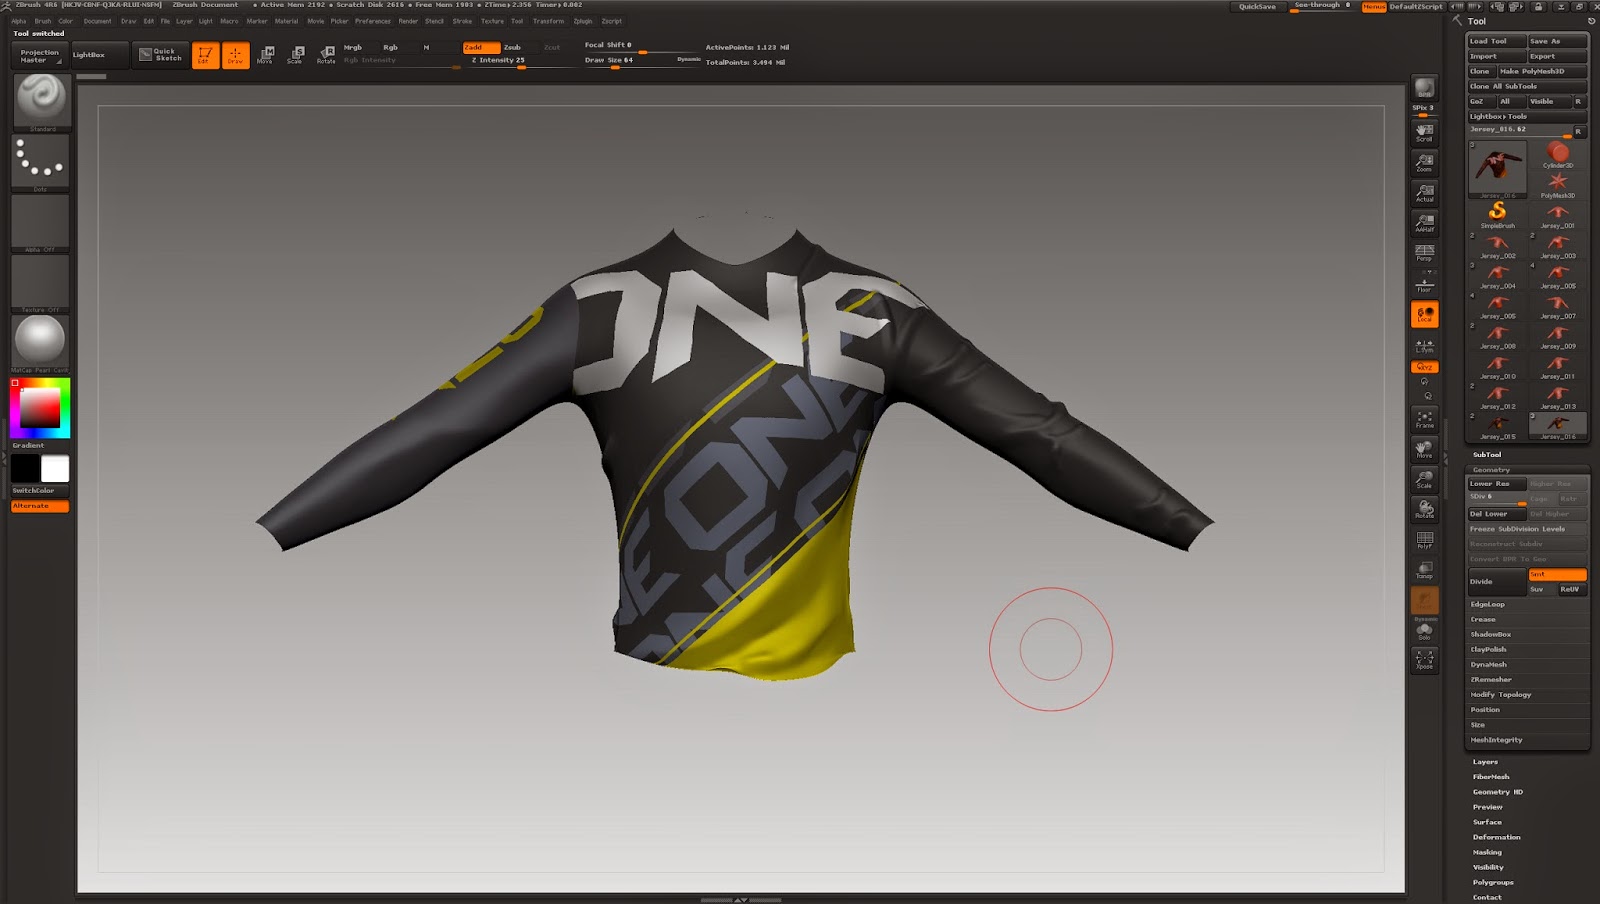
So decided to undo what I did on the arms and start again. But firstly I added a texture I worked on in Photoshop from scratch  to the mesh to get a feel on what the top would look like. This Also shows another different mesh as I needed to unwrap the mesh again so that the arms wasn't overlapping allow me to create the new texture sheet. I did the same method of project the detail onto the new mesh.


This image shows a back view of what the mesh and texture looks like at that stage.


This image shows my work on the folds of the right hand side.

This image shows my work on the folds of the left hand side.


Then worked my way around the body to the back again creating small folds around the back of the arms, at the top of the shoulders and neck area. While create much larger folds at the base of the lower back just like the ones at the front.


This Image Shows the final out come of the front view with the final texture applied. 

This Image Shows the final out come of the back view with the final texture applied. 


After Completing the mesh I decided to export the High poly mesh for use in X-normals where I can use it to create a Normal map and AO map.