Sunday 27 December 2015

MK1_Interior_Workflow_Part_4

 Part 4 of the interior Shows some final Renders of my textured objects.


Gear Stick


Pedal Box 


Hand Brake Missing the second shader


Dash Gadgets


Dash Board

Saturday 21 November 2015

MK1_Interior_Workflow_Part_3

Part 3 of the process of making the MK1 and it shows me following up on modelling unwrapping and creating shader colour ID's fort the car ready for import to Unreal.


This image shows the the final mesh with the shader ID's found in the material Editor.   


Final Mesh with material ID's set up. 


Shader render of the seat and harness.


Wireframe of the seat and harness. 


Close up of the harness connections to the car body.


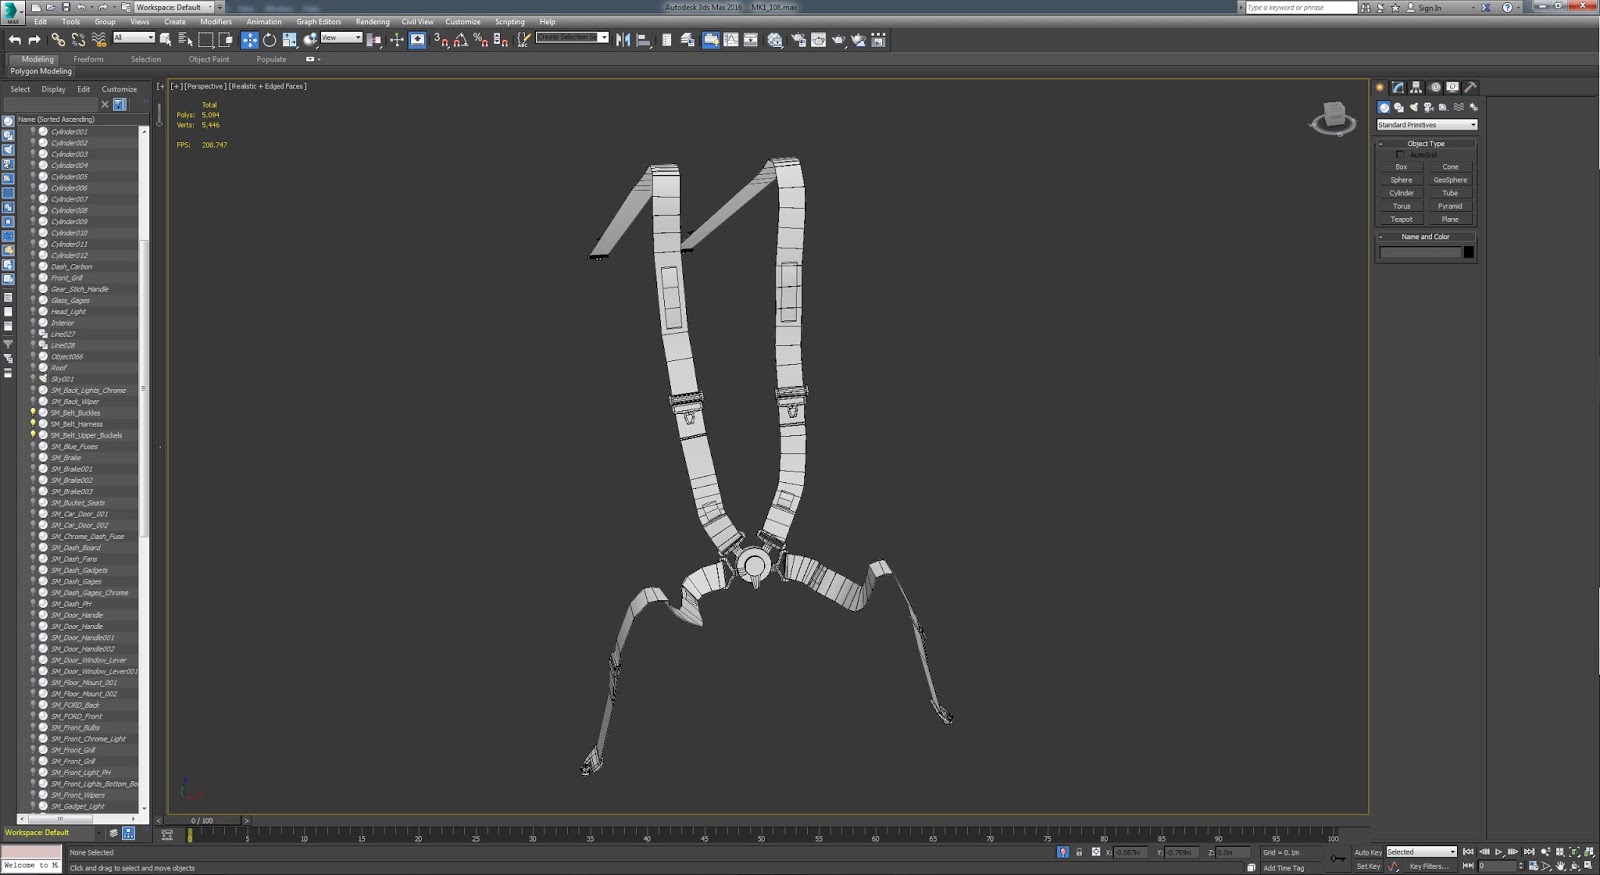
Complete Harness (WireFrame). 


Final dash gadgets.


Complete pedals wireframe. This was a challenge for me to create as it was hard to get good references from all angles. The reason I went with a floor mounted pedal box was it fits the characteristics of the car plus made sense as my dash didn't come down lower enough for the pedals to come from the bottom of the dash. 


Shader Version Of pedals.


Went back and recreated the handbrake using a more professional racing drift/rally type of handbrake.


Added the mesh smooth to the gear stick and also added the metal frame to which the attaches the gear stick to the main shell of the car.


Went back and double checked the exterior and miss the window wipers so created a simple design which will be chrome.


I also remodelled the wing mirrors to go with the look of the MK1 out of Fast 6.

Friday 4 September 2015

MK1_Interior_Workflow_Part_2

Carrying on From my last post this is part to of the Interior and the seat rail.


Creating This mesh was difficult due to creating the holes in which the bolts fit in. However created the base of the mesh using splines and then made it into an edit poly to edit to suit my needs and allow me to boolean the holes, I tidied the mesh after doing the boolean.


Blocked out the remaining rail system using basic objects and spline techniques. 


Create more detail inside the rail section itself.


Where the holes where on the legs I used as a template to create the washer and bolt and then removed the hole as there was no need for that detail as it will no longer be seen. 


Created some smaller detailed object like the window opener and inside door handle.


Blocked in a simple handbrake which personally don't like so will most like change that when I go back and edit things.


Created the gear stick from a sphere and cylinder will properly smooth this later on. 


Created a role cage for inside the car using splines. 


Decided I didnt like the look of the rims so went back and modelled these instead as wanted to make it more like the MK1 out of Fast 6


Sunday 12 July 2015

MK1_Interior_Workflow_Part_1


For the interior pipeline I decided to work outwards and work on the main body first then move in and work on each individual piece afterwards. This was way of working in my personal opinion. 


Started with the door as wanted to start off small and make way for the bigger pieces after. This Image above shows the end result without the small screws which will be added later on in the pipeline. Its broken down into two parts one being the outside and edging on the inside as this will have the car paint shader but is also made from one part of metal. While the main part of found under the window is separate and will have a different shader either carbon fibre or leather haven't made that decision yet. I then simply mirrored the door to save time.


I then took on the challenge of making the main inside body. Image above shows the start process using the existing outer body as a starting point.  


The Image shows the completed inside mesh which will be kept separate from the main outer body due to me having different unwraps. 


Using both of the shells of the car and reference images I was able to create a dashboard. I made it as low as possible blocking in the shape I desired. I also used reference images to decide how I wanted my dash gages to look like and placement. I managed to find a nice image of a steering wheel to use as a reference and work from to create the object before importing and scaling it to size to fit and finish off the basic look.


This image shows the dash after I smoothed it out as wanted more smoother edges around the whole mesh but especially the Fan areas to give them a more circular form. 


From that I was able to move onto creating the Bucket seat and rail. For this I got a simple template offline as didn't want a to complex and crazy design for such an old car thought it would look weird if the design was to edgy. This was my starting point. I only created one side as could use the symmetry modifier to complete the process. 


This was the second stage I got to building in more and creating a more bucket seat look. Adding both the head rest hole and also seat handle hole. Folded the edge outwards to follow the references I found as well. Kept the mesh low while working before smoothing.


This is the complete seat with it smoothed.


Garage_Scene

So after completing the scene with all the object imported and textured. I decided to work on the car shader. With hours spent researching different techniques and options I decided to go with one I felt would do the best job while also tweaking it suit my need. 3 hours later and my shader was complete. Image below shows the breakdown of the shader.
While the rest of the images show off the final scene.


Monday 27 April 2015

Ford Escort MK1 Model For Car Garage Scene

I moved on to focusing on the main asset in the scene the Car itself .


I downloaded the blue prints from a website and set them up in Max. Started blocking in the front of the car 


From there I was able to carry on and finish the basic form and body of the exterior.


Back section of the car.


Then started to add the more finer details to the body work like the grill headlights and chrome bumpers.


by using this technique of modelling everything from the same mesh I was able to easy extract each major part of the body work to which add thickness and detail.


I then added more detail to each section of the car. Finally finishing up the modelling of the exterior. 


I began unwrapping the mesh the images below show the stages.


Final image shows the cars unwrap.


I then went through all the objects in the scene and applied there own shader for when in unreal.


This is the Multi-Sub object with the shaders used.