Monday 24 October 2016

Kukri Blade UV Unwrap Project Part 3


The final stage of the modelling was unwrapping the model.  I started the way I have with the other two stages with the blade section. 


I began with breaking the two major faces off this was the bulk of the work done on the blade section. The major work was the top and bottom sections of the blade.


This was the unwrap of the blade mesh after I completed the top and bottom sections.


I moved on to the handle section of the blade this was simpler than the blade to complete as the bulk of it was one UV shell. 


After completion of both the sections of the blade I merged the mesh together, this was so that I could do two things one was to get the blade and handle to fit in the UV space desired 2048x1024. I also used tex tools to get smoothing groups from UV shells. 


Lastly for the export I had to fit the UV into 1 by 1 texture coordinates. The reason for it was for the texturing process as going to use substance painter which only accepts 1 by 1. However can change once in SP. 

Tuesday 18 October 2016

Kukri Blade High Poly Project Part 2


Now becomes the production of the High Poly one of the reasons for this project. As personally I typically use the the turbosmooth and hard edge loops to create my high poly, However Tim shows the crease edge and open sub division high poly technique. I found this really easy to understand and useful. I could see why some artists like to use this technique. But as with most techniques there's pros and cons.


This image shows the low poly mesh that I'm using as a base to create the high with the use of open sub division modifier on it. I selected the edges needed and ensured they had high crease values found in the edge selection options.


After finishing the blade I decided to create the blade handle indent parts this was created from a plane and modelled into shape. I then rotated it into position and duplicated it several times while scaling where needed to get the desired look. 


I then went back to creating the high poly mesh of the handle base using the open subdivision method. Went smoothly until I came into an issue where I created a fine extrusion to split the handle into the two material parts. I had to tweak the low poly mesh to get the high subdiv high poly to line up the way I needed it to.


This was the final out come of the high poly mesh.

Wednesday 12 October 2016

Kukri Blade Low Poly Project Part 1


I wanted to do this tutorial with two goals in first one expanding my knowledge on substance painter and secondly I noticed that Tim Bergholz  (Chamfer Zone) used a different technique than usual to create the high poly model so thought I could learn it for future productions. 


Started by using the reference image provided and began blocking in the blade Topology. I ensured that the middle of the blade was on the 0,0,0 to help get a perfect symmetry without needing to tweak it every time. For the whole part on the blade I created a cylinder and enabled snap to vertex mode and used the cut tool to create the cylinder on the blade mesh. After that I deleted the reference cylinder tidied up the topology. I also extruded the cylinder I created to the middle of the blade to align it with the rest of the mesh.


After the main block out I defined the blades shape further adding the thickness and edge detail in the middle of the blade.


To create the teeth part of the blade I created a cylinder and duplicated it several times while lining it up to the reference image behind. After that I used the boolean technique and fixed the topology errors that went with it.


I used the same technique for the below teeth section of the blade. Moving on to the handle I started with a simple block out mesh I also used the straight handle reference image as I could then later use a FFD modifier to bend it slightly.


I then defined the handle more by adding more subdivisions and also creating the sections for the bolt parts on the handle. I then used a FFD modifier like I said previous to bend the handle slightly.  


The image above shows the final low poly with rough mapped out smoothing groups. 

Friday 19 August 2016

Garage Scene 2.0 Part 6


These images found in this post are the final renders of the Project. They contain shots of the car in the garage environment and also interior shots of the car including close ups of the dash gadgets and seats with harness setup.


Thursday 30 June 2016

Garage Scene 2.0 Part 5


Once I done a full run down of things left to do on the interior, I came across the meshes I created quite late in the project the interior light and rear view mirror. For the light I used the same shaders as the other lights within the room. As of the mirror I used a mid black shader and I created a reflections shader using a scene capture cube. The process can be seen within the images below.


I increased the default value of the cube map as wanted the image to look more crisp.


I duplicated the shader and create two new scene capture cubes to create the same effect for the wing mirrors.

Monday 27 June 2016

Garage Scene 2.0 Part 4


I then began to create the interior textures for the objects inside the car, once again I made a few mistakes, however I did learn them and will never do them again the major one not making sure that the ddo project was set for UE4. However one texture I will like to share with you is the carbon fiber one as done is from scratch in max through to PhotoShop and finally finishing in Unreal. 


This is the mesh I created within max as you can see its fairly basic done using a cylinder removing the unnecessary polys and moving/rotating into place. Once I done that I ensure that it was also tileable texture.


This image and text explains how I went about creating the process of the textures before going into unreal to build the shader.


This shader was built up of three sections one the base to which I used my textures, then created a reflections mark and also reflections blending them together for the reflections I used a scene capture 
cube as well for realism.


This Image shows the shader applied to the objects.


The next in the check list for me to do was create the interior paint shader as I needed it to be slightly different to the exterior one as needed it to be more Matt in appearance. I also needed to add some fine details for this I created a normal and ao map in ndo. 


This Image shows the shader applied.


Another shader was made again for the doors as needed one with the same properties as the interior paint body but with out the normal and ao map.

Thursday 23 June 2016

Garage Scene 2.0 Part 3

Through this project I have learned so much and even though I had on many occasions have to go back and forth with importing the car mesh  as it had many technical issues such examples range from mesh topology, material ID or with either the light map or texture UV.  

As I used a script for the first light map pass I found that it gave artifacts over the objects to solve this issue I found a simple way of copying the UV set for the textures to the light map set. This solved the issue I was getting. 


This image is a prime example as I realised after importing the mesh that I would then need to create a multi sub object material for the door as this will eventually have 3 different shaders attached to it so from that I went back and amended the object.


From the technical issues I was having with the car mesh I also realised that I missed some key assets to the car model including an inside light and also a rear view mirror. The interior light was a duplicated mesh from the orange lights at the front of the car with a few edits made.


I used a mixture of texture software for this project mainly focusing on ddo and ndo with photoshop adjustments etc. after creating the seems of the bucket seat in Zbrush I exported the normal map and used that as a base as well as a ID and AO map for ddo. From completing the texture I imported the textures and created a basic PBR shader for the bucket seat. I soon came to dislike the textures I produced.


I used the skills I have learned throughout the project and decided to create a simple shader that emulates the effect I wanted to achieve. This was done using the original normal map from the sculpt I did of the bucket seat as well as the normal paint map. Them to blended together with a vertex colour node and simple constant node for roughness and metalness.  


The Final effect of the bucket set can be seen above with the shader applied.


 I also went back and finished off the harness texture as this was missing the logo sections of the object. As for the metal parts I used the metal master shader I created previously.


Friday 10 June 2016

Garage Scene 2.0 Part 2


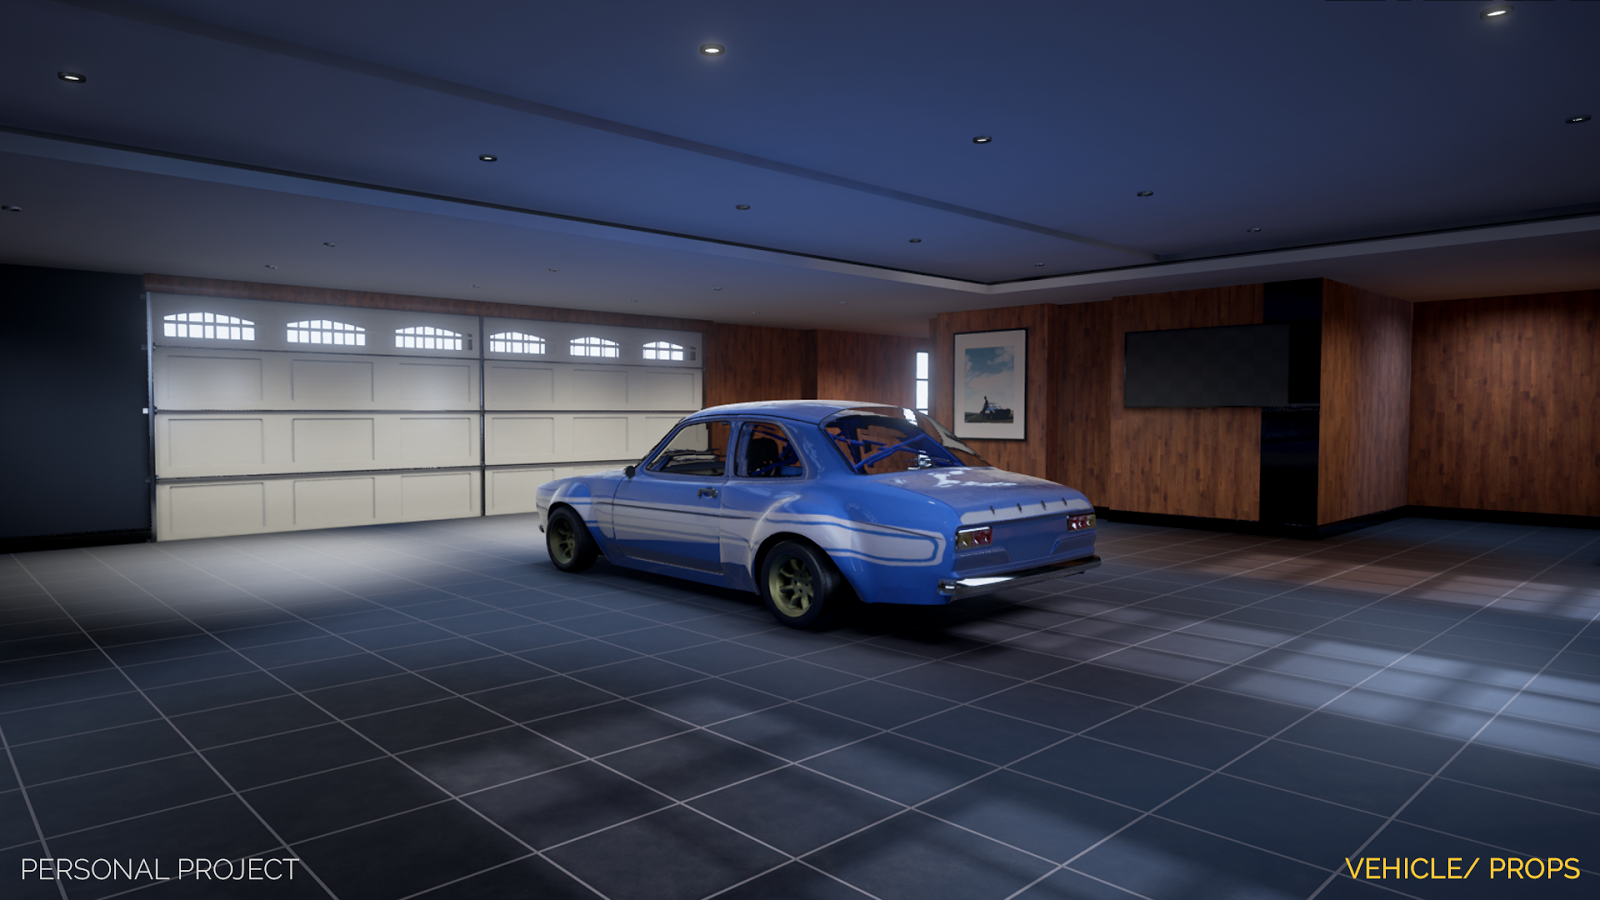
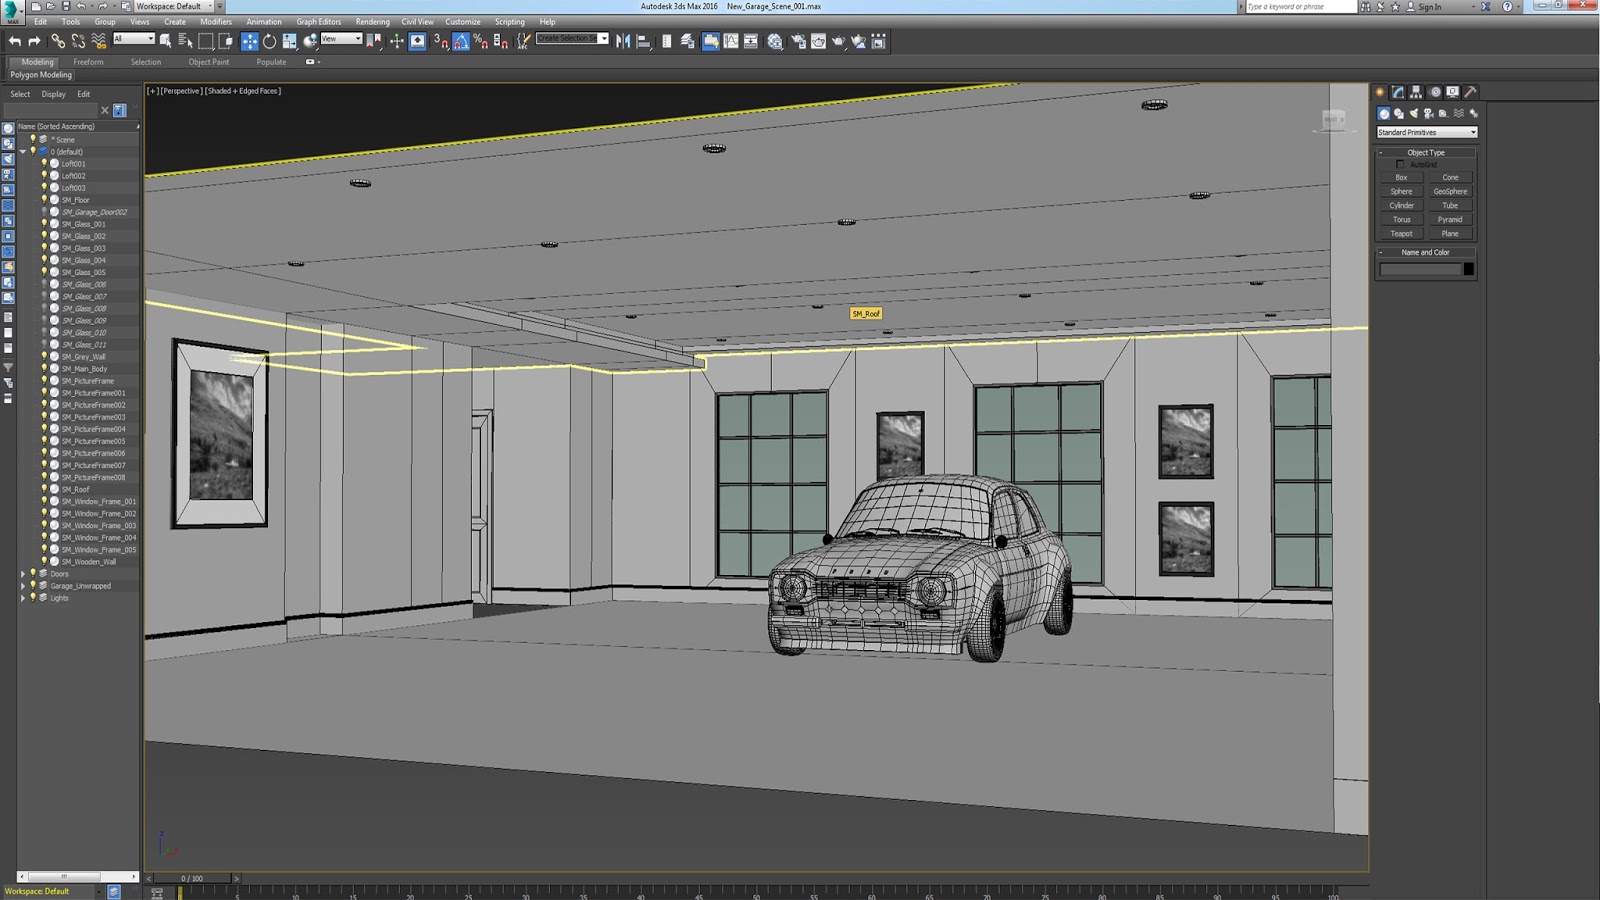
From the basic setup I had created I was able to start adding depth and character to the scene. 


I started the process by adding the main element of the project the car model to the center of the room making it the main focus and also allow the player to freely move round the car with no issues like clipping etc. 

I then began the production of the shaders creating a range of gloss to Matt finished in white and black, while creating unique shaders for certain objects such as the floor and the wooden wall. I also managed to merge the old car shader from the old project into this one so I didn't have to start from scratch.


I then went onto creating metal like shaders for use of a range of objects one being a mater shader to which I created a range of instanced shaders. For the floor I created a marble texture/shader from an image offline creating a albedo,normal,gloss and ao maps.

After getting a more defined look of the garage I got rid of the quick light setup I created previously and developed a more polished feel to the environment. I scattered some sphere reflection captures around the room. While keeping to the realistic approach added a spot light to each of the light meshes in the roof.  

I also added a first person camera to the scene for use later on in the development.


I ended up tweaking the lights multiple times before getting the look I desired. I also went and redone the floor texture as I wasn't happy with the marble look and went with dark tiles to match the feel of the room more.


For the picture objects I kept to the theme of fast and furious. Gathering sources from online and uving them to the objects. As you can see I also moved some of the pictures around this was due to wanting to make use of the wall space and also better design in my opinion. 

I came back to the walls as well and created the dark grey shader I wanted for that side of the room.


I felt within the scene the garage doors looked plain and there wasn't much detail in terms of real life usage. I solved this by creating a rail system that slides the doors up and into the roof via the wooden curved slot. This was a design idea as did't want the rail system to look out of place to the rest of the scene by keeping it simple and clean.


I made sure I went into enough detail without going to crazy on the topology. 


This is what the rail system looks like in the unreal project with the rail system itself being a steel like material wile the above has two shaders with the inside being black for darkness and outside being the wooden wall shader.


Saturday 14 May 2016

Garage Scene 2.0 Part 1


After finally finishing the modelling and texturing of the Ford Escort MK1. I decided to have a look back at the overall scene and decided I wasn't happy with the environment that the car would be set in. This was down to the purpose of the scene, It felt random like why would a shiny well looked after show car be in a run down american garage. For that reason I revisited the scene and began reconstructing it.

Went through loads of different ideas, however ended up sticking with the one below.


Firstly I brought in a combined mesh of the car to use as a template on size and placement within the scene.
I structured the garage using a modular approach ensuring that the measurements for objects such as the windows were the same all the way round etc. After finalising the concept and shape I moved onto adding the detail. By adding window frames and glass and doors leading to what would be the apartment and garden. 


Went about adding skirting boards using splines and loft function.


I added more detail to the roof trying to give more character to the scene and not just a plain flat roof. I also added a lot of spot lights as wanted to ensure the scene would be well light for real life purposes.


Ended up having to add some more modular walls in to either side of the front. This was due to the size of the garage doors. From that i was able to create again one door and duplicate it.


I wanted some objects on the wall to break up the emptiness and negative space. 


I also added a TV to the scene as wanted to have a video clip of some sort on a loop for the player to experience.

I went through and unwrapped both UV channels. One being for colour information and the other for light map. This was done using a script to auto generate the light map making a quicker process. From there I created material and material ID's for the scene.


As the room was created from a plane I need to shell the object and create an outer layer to create shadows correctly.


Once that was all done I used another plug-in script called TSTools to export all the meshes at once.


I added lights and simple materials as a base to work from.